
Happy Hash
해시태그 커뮤니티
2023-06-22
소개
해시태그를 그룹화 하여 참여할 수 있는 커뮤니티 사이트.
Guide 페이지는 SSG를 통해 구현.
Next.js Page Router + Typescript
DB
-
Planet scale
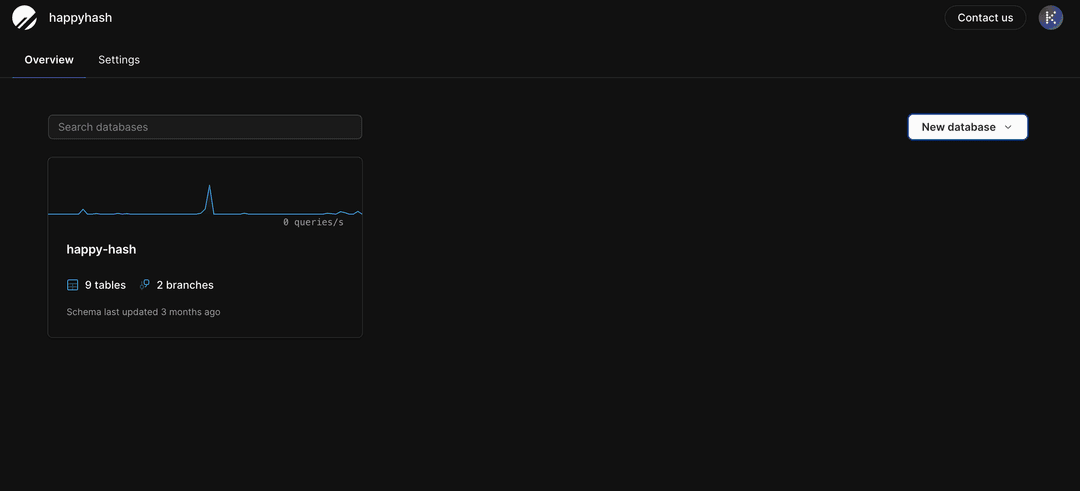
MySQL Compatible serverless database platform
-
Vitess는 MySQL을 스케일링하기 위한 데이터베이스 클러스터링 시스템
-
Vitess를 기반으로 하는 관계형 데이터 베이스가 PlanetScale이다.
db에 브랜치를 제공하며, 마치 git과 같은 cli를 제공해준다.
-
-
Prisma ORM
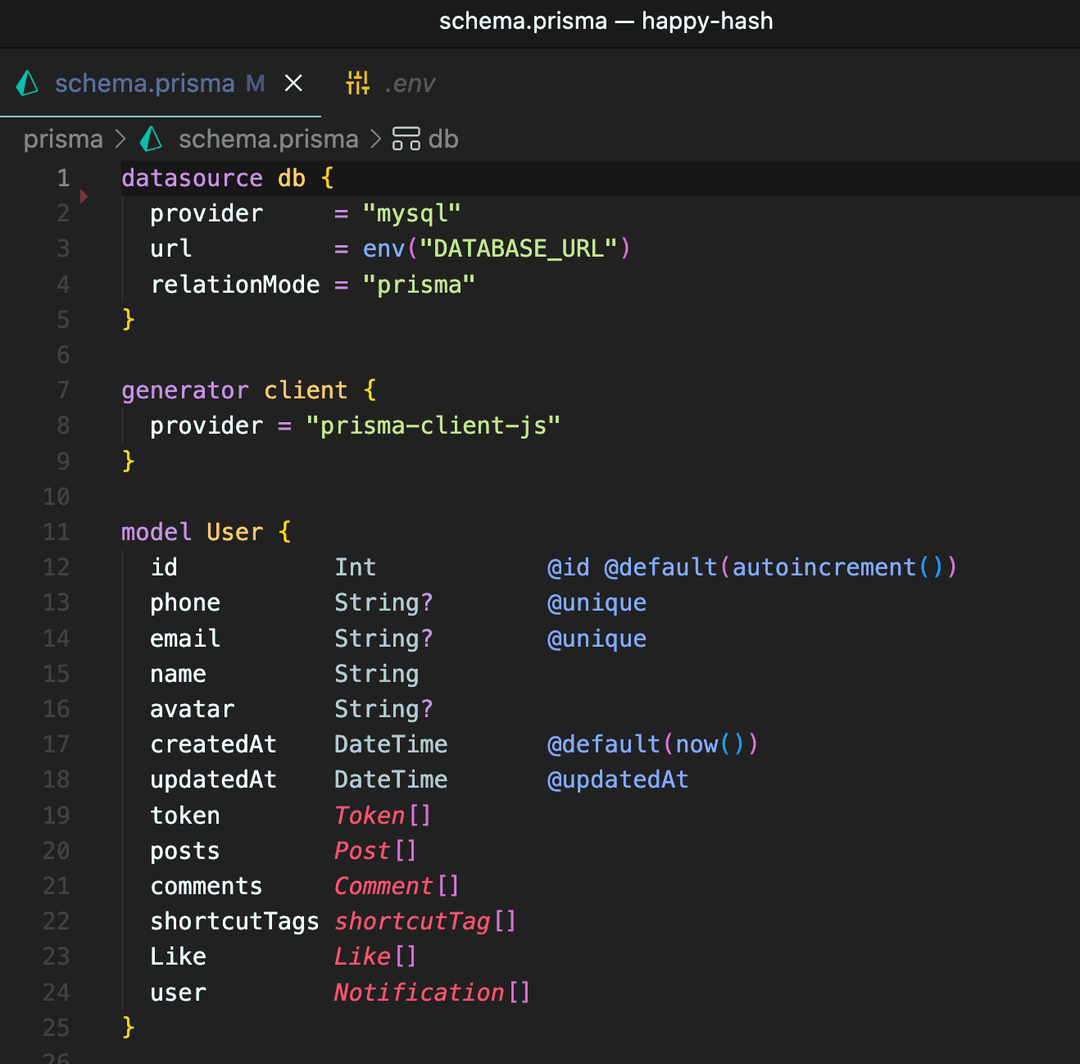
DB ORM으로 데이터베이스 테이블을 객체로 취급하여 데이터베이스 작업을 추상화한다.
SQL 쿼리를 작성하지 않고도 데이터베이스 작업을 수행할 수 있으며
타입 안정성과 Prisma Client가 제공하는 자동 완성과 IntelliSense 등의 이점을 취할 수 있다. -
Prisma ERD

파일 업로드 스토리지
- Cloudflare Image
스타일
- tailwind css, sass(gray matter style 용)
hook
- useSWR
- react-hook-form
- useMutation (커스텀 훅)
전역관리
- Recoil
라이브러리
- heroicons
- gray matter
- next-themes
- Framer
- iron-session
- https://github.com/vvo/iron-session
- 서명, 암호화된 쿠키를 사용하는 nodejs stateless 세션 도구
- JWT는 암호화되지 않고 서명이 되어있음
- 유저가 안에 있는 정보를 볼 수 없음
- 세션을 위한 백엔드 구축이 필요 없음
파일 구조
-
 📦libs
 ┣ 📂client >> 클라이언트 훅
 ┗ 📂server >> 서버 훅
 📦components >> 컴포넌트
 📦pages
 ┣ 📂api
 ┃ ┣ 📂community
 ┃ ┃ ┣ 📂posts
 ┃ ┃ ┃ ┣ 📂[id]
 ┃ ┃ ┃ ┃ ┣ 📂comments
 ┃ ┃ ┃ ┃ ┃ ┗ 📜index.ts
 ┃ ┃ ┃ ┃ ┣ 📜fav.ts
 ┃ ┃ ┃ ┃ ┗ 📜index.ts
 ┃ ┃ ┃ ┗ 📜index.ts
 ┃ ┃ ┗ 📜index.ts
 ┃ ┣ 📂hashs
 ┃ ┃ ┗ 📜index.ts
 ┃ ┣ 📂search
 ┃ ┃ ┗ 📜index.ts
 ┃ ┣ 📂user
 ┃ ┃ ┣ 📂me
 ┃ ┃ ┃ ┣ 📜[type].ts
 ┃ ┃ ┃ ┗ 📜index.ts
 ┃ ┃ ┣ 📜confirm.ts
 ┃ ┃ ┣ 📜login.ts
 ┃ ┃ ┗ 📜logout.ts
 ┃ ┣ 📜files.ts
 ┃ ┗ 📜ranking.ts
 ┃ ┃
 ┣ 📂community
 ┃ ┗ 📂posts
 ┃ ┃ ┣ 📂[postId]
 ┃ ┃ ┃ ┣ 📜edit.tsx
 ┃ ┃ ┃ ┗ 📜index.tsx
 ┃ ┃ ┣ 📜index.tsx
 ┃ ┃ ┗ 📜write.tsx
 ┣ 📂guide
 ┃ ┣ 📜[slug].tsx
 ┃ ┗ 📜index.tsx
 ┣ 📂profile
 ┃ ┣ 📂[type]
 ┃ ┃ ┗ 📜index.tsx
 ┃ ┣ 📜edit.tsx
 ┃ ┗ 📜index.tsx
 ┣ 📂search
 ┃ ┗ 📜index.tsx
 ┣ 📜_app.tsx
 ┣ 📜_document.tsx
 ┣ 📜index.tsx
 ┣ 📜login.tsx
 ┗ 📜test.tsx

📦posts-guide >> Guide 페이지 md 파일
구현 기능
1. 로그인
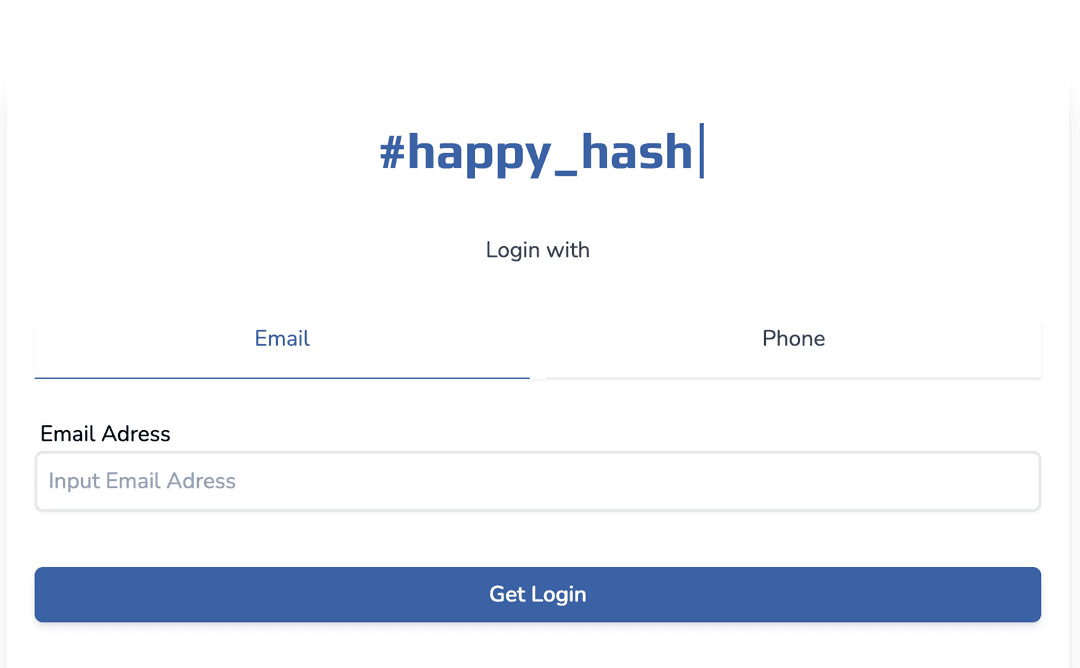
SMS 로그인 방식
이메일, 또는 폰 번호를 받는다.
로그인 버튼을 누르면 랜덤한 토큰 번호를 생성 후, 입력값을 토대로 유저 db 생성
이후 메일 혹은 폰 번호로 토큰 number가 발송 된다.
twillo 서비스를 사용하여 테스트 하였으나 금전적인 문제로 배포에선 구현하지 않았다
대신 테스트에 용이하게 token 값을 전송하여 input에 바로 채워질 수 있도록 구현하였다.
async function handler(req: NextApiRequest, res: NextApiResponse) {
  if (req.method === "POST") {
    const {
      body: { email, phone },
    } = req;
    const user = phone ? { phone } : email ? { email } : null;
    if (user === null) return res.status(400).json({ ok: false });
    const payload = Math.floor(10000 + Math.random() * 10000) + "";

    // Prisma ORM 으로 유저 데이터 생성
    const token = await client.token.create({
      data: {
        token: payload,
        user: {
          connectOrCreate: {
            where: {
              ...user,
            },
            create: {
              name: "Anonymos",
              ...user,
            },
          },
        },
      },
    });
    return res.json({ ok: true, token: token.token });
  }
}
 토큰값 입력시 token 테이블에서 해당 토큰을 찾는다.
해당 토큰을 가진 유저를 찾아 session(iron session)에 저장하고 해당 유저의 토큰값을 전부 삭제한다.
async function handler(req: NextApiRequest, res: NextApiResponse) {
  if (req.method === "POST") {
    const {
      body: { token },
    } = req;
    const ok = await client.token.findFirst({
      where: { token },
    });
    if (!ok) return res.status(404).end();
    else {
      req.session.user = {
        id: ok.userId,
      };
      await req.session.save();
      await client.token.deleteMany({
        where: {
          userId: ok.userId,
        },
      });
      res.json({ ok: true });
    }
  }
}
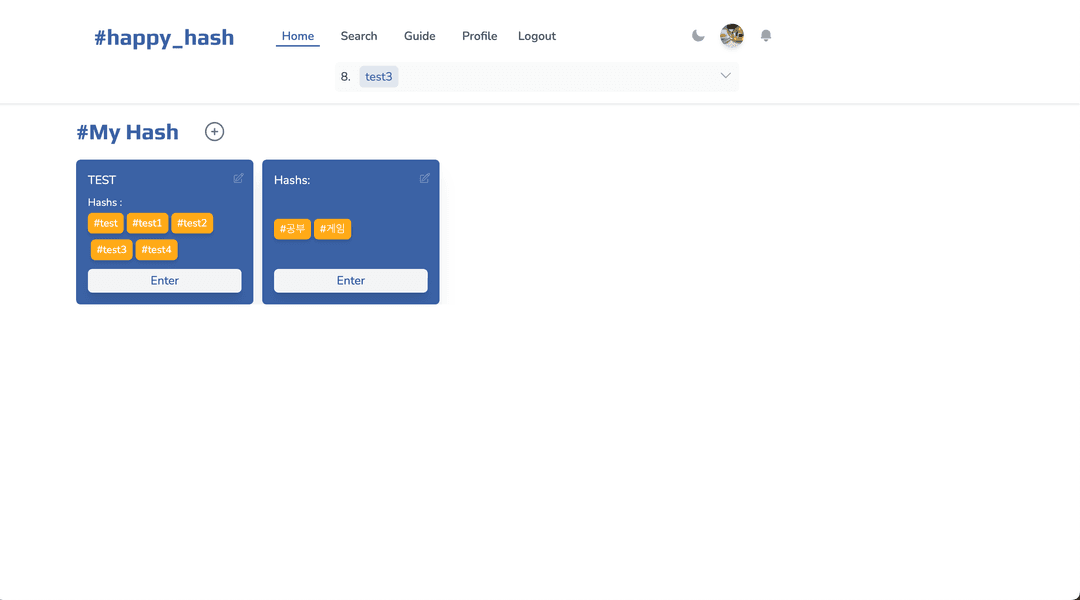
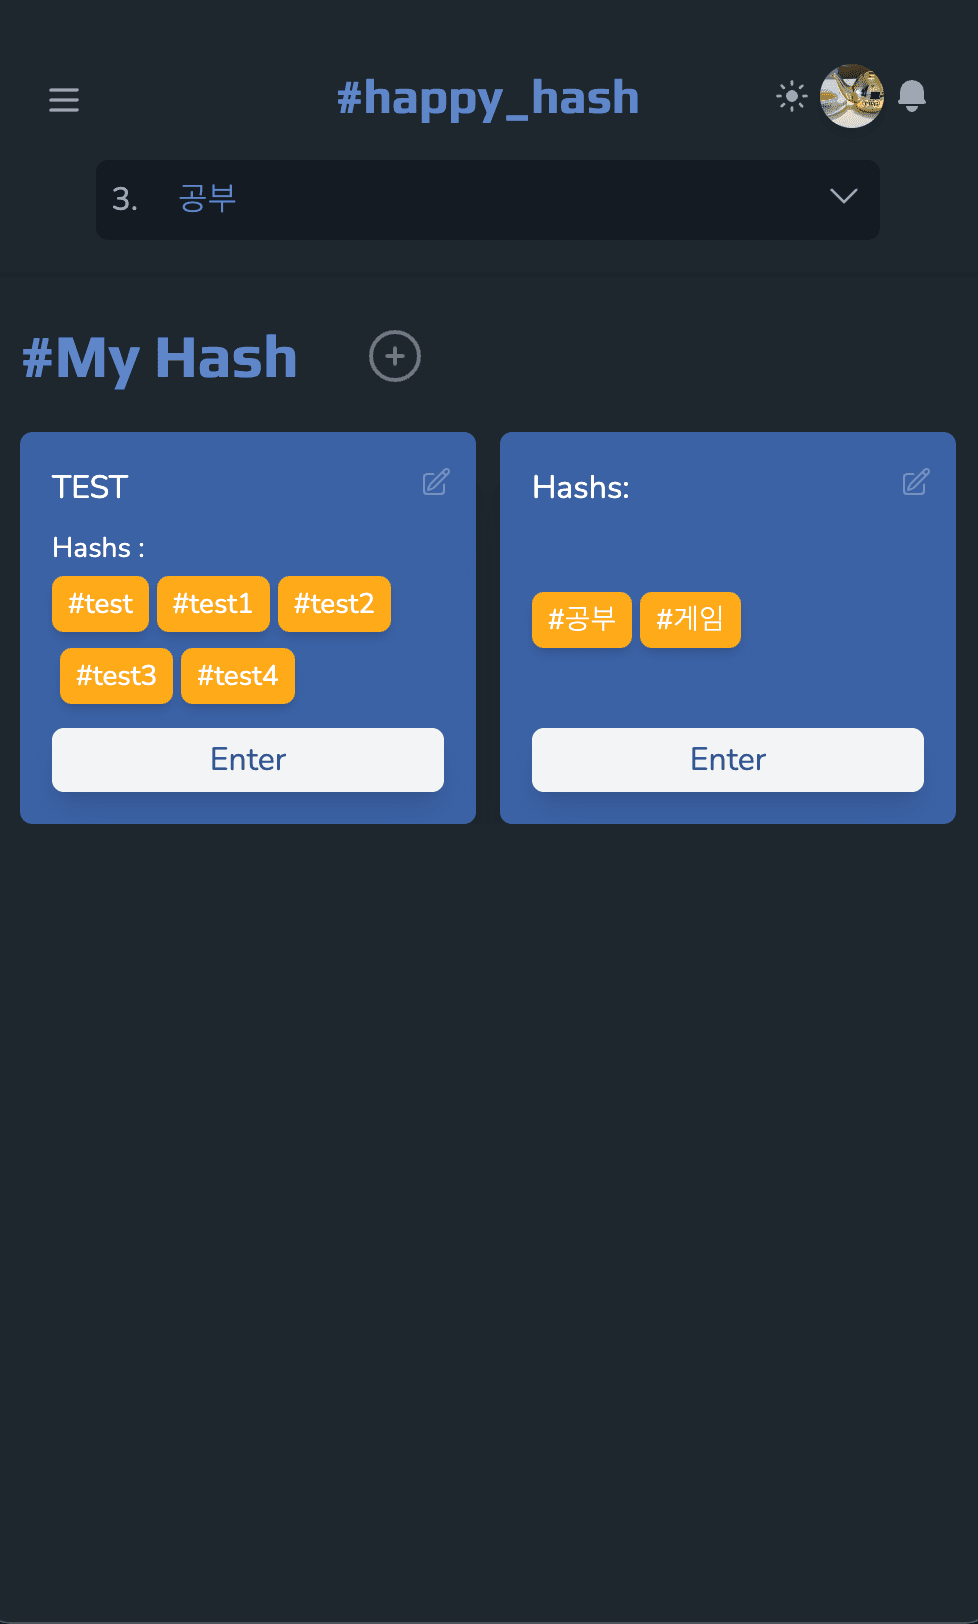
2. 홈 화면
로그인 이후 홈 화면이다.
관심있는 해시들을 모아 숏컷을 만들거나, 검색, 프로필 편집, 로그아웃 등이 가능하다.
-
숏컷태그 GET 요청
if (req.method === "GET") {
  const {
    session: { user },
  } = req;

  const tags = await client.shortcutTag.findMany({
    where: {
      userId: user?.id,
    },
    include: {
      hashtags: {
        select: { id: true, name: true },
      },
    },
  });

  res.json({
    ok: true,
    tags,
  });
}
반응형 웹, 다크모드를 지원한다.
3. 해시태그 등록
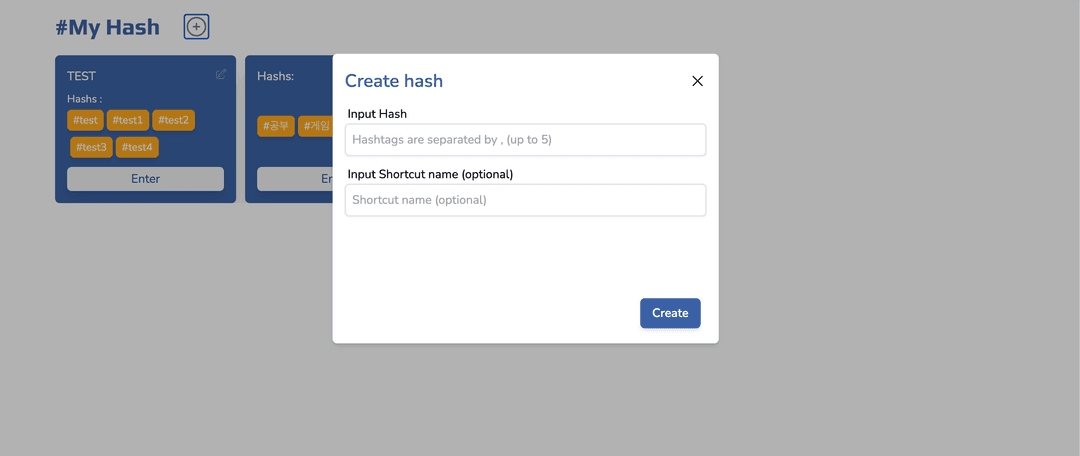
' + ' 버튼을 누르면 해시태그를 생성할 수 있다.
 띄어쓰기, 특수기호는 생략되고, 하나의 숏컷당 최대 5개의 해시태그를 넣을 수 있다.
해당 해시태그가 db에 존재하지 않으면 만들어지고, 있으면 숏컷 테이블과 연결한다.
-
숏컷태그 POST 요청
if (req.method === "POST") {
  const {
    session: { user },
    body: { hashs, shName },
  } = req;

  const connectHash = hashs.map((name: string) => {
    return { where: { name: name }, create: { name: name } };
  });

  const tags = await client.shortcutTag.create({
    data: {
      customName: shName ? shName : "",
      name: hashs.toString(),
      user: {
        connect: {
          id: user?.id,
        },
      },
      hashtags: {
        connectOrCreate: [...connectHash],
      },
    },
  });

  res.json({
    ok: true,
    tags,
  });
}
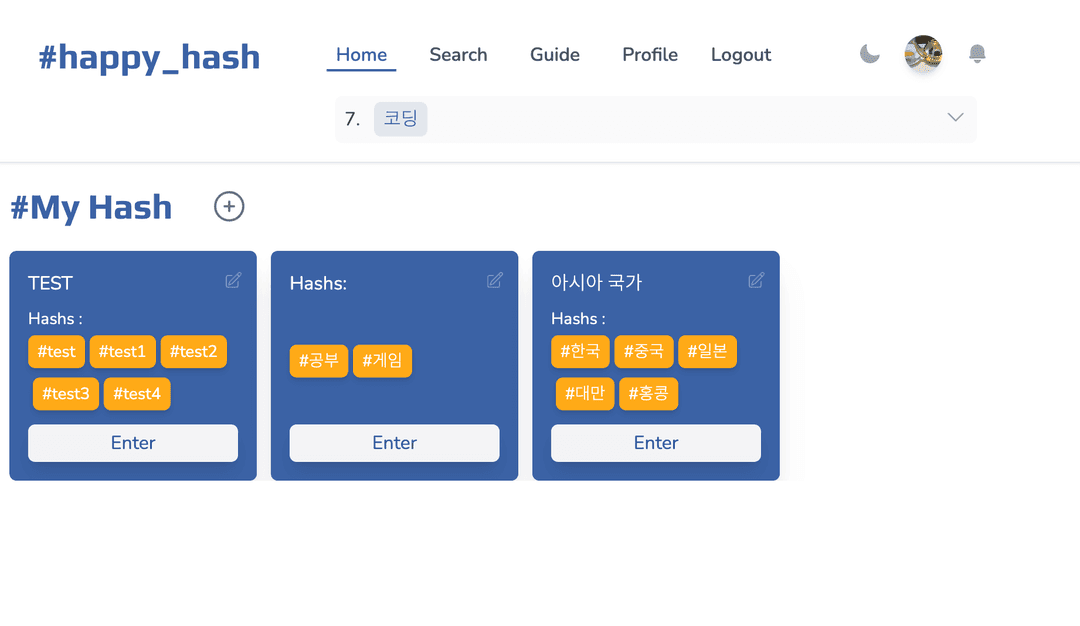
Enter 버튼을 누르면 해당 숏컷들을 카테고리 형식으로 포함한 페이지로 이동한다.
숏컷 컴포넌트 내부에 있는 해시태그를 누르면 해당 해시태그만 포함한 페이지로 이동한다.
우측 상단의 불투명한 버튼은 edit 기능으로, 누르게 되면 Edit Form이 나온다.
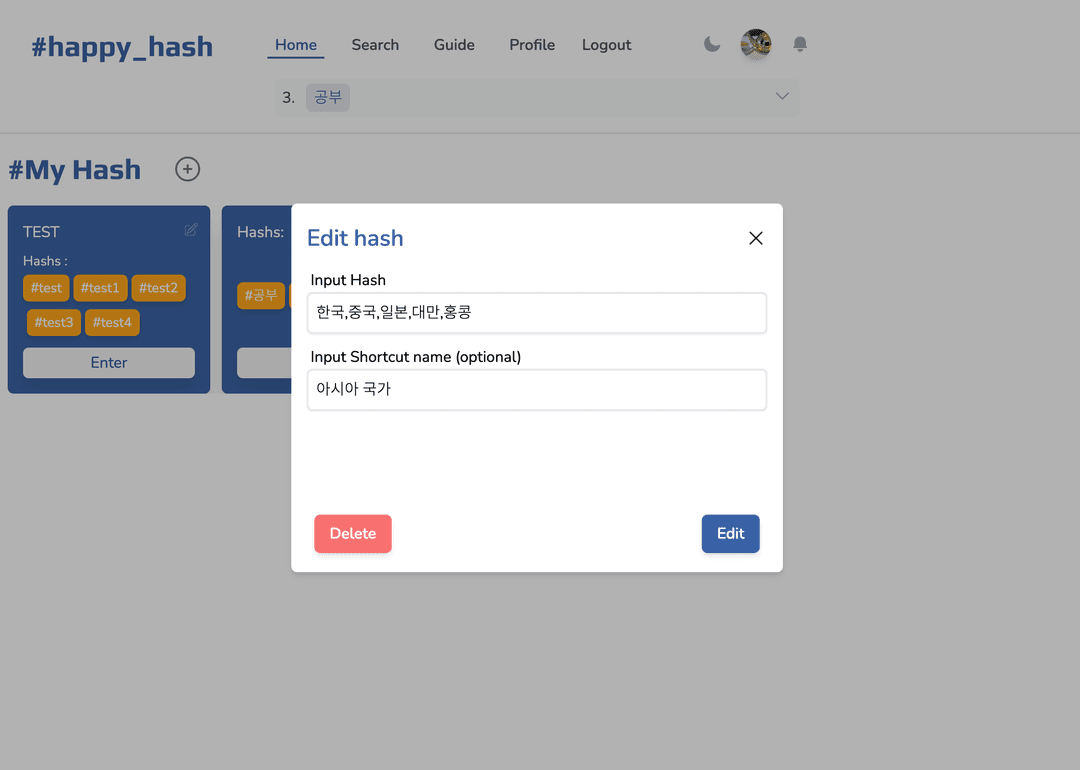
삭제와 편집 기능이 존재하고, 삭제시 숏컷 테이블은 삭제되지만, 해시태그들은 삭제되지 않는다.
Create와 Edit은 서로 컴포넌트를 공유한다.
-
숏컷태그 PATCH 요청
if (req.method === "PATCH") { const { body: { id, hashs, shName }, } = req; const prevHash = await client.shortcutTag.findUnique({ where: { id: id, }, select: { hashtags: { select: { id: true, name: true, }, }, }, }); const prevHs = prevHash?.hashtags.map((hash) => hash.name); const createOrConnect = hashs.filter( (hash: string) => !prevHs?.includes(hash) ); const disconnectHash = prevHs?.filter((hash) => !hashs.includes(hash)); await client.shortcutTag.update({ where: { id: id, }, data: { customName: shName, hashtags: { disconnect: disconnectHash ? disconnectHash.map((hash) => ({ name: hash })) : undefined, connectOrCreate: createOrConnect ? createOrConnect.map((hash: string) => ({ where: { name: hash }, create: { name: hash }, })) : undefined, }, name: hashs.toString(), }, }); res.json({ ok: true }); } -
숏컷태그 DELETE 요청
if (req.method === "DELETE") {
  const {
    session: { user },
    body: { id },
  } = req;

  const deleteValidate = await client.shortcutTag.findFirst({
    where: {
      AND: [{ id: id }, { user: { id: +user?.id! } }],
    },
    select: {
      hashtags: {
        select: {
          id: true,
        },
      },
    },
  });

  if (!Boolean(deleteValidate))
    return res.json({ ok: false, error: "Validate failed" });
  const disconnectHash = deleteValidate?.hashtags?.map((hash) => ({
    id: hash.id,
  }));
  await client.shortcutTag.update({
    where: {
      id: id,
    },
    data: {
      hashtags: {
        disconnect: [...disconnectHash!],
      },
    },
  });

  await client.shortcutTag.delete({
    where: { id },
  });

  res.json({ ok: true });
}
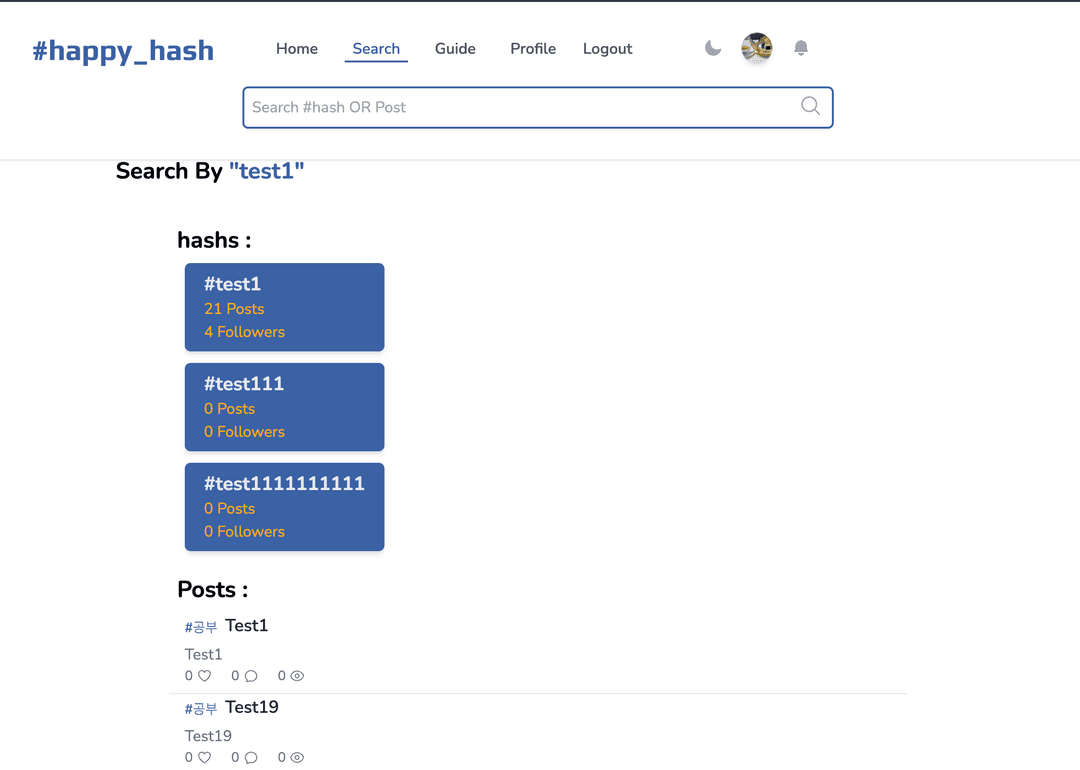
4. 검색
검색어와 관련된 해시태그나 posts를 보여준다.
5. 해시태그 홈
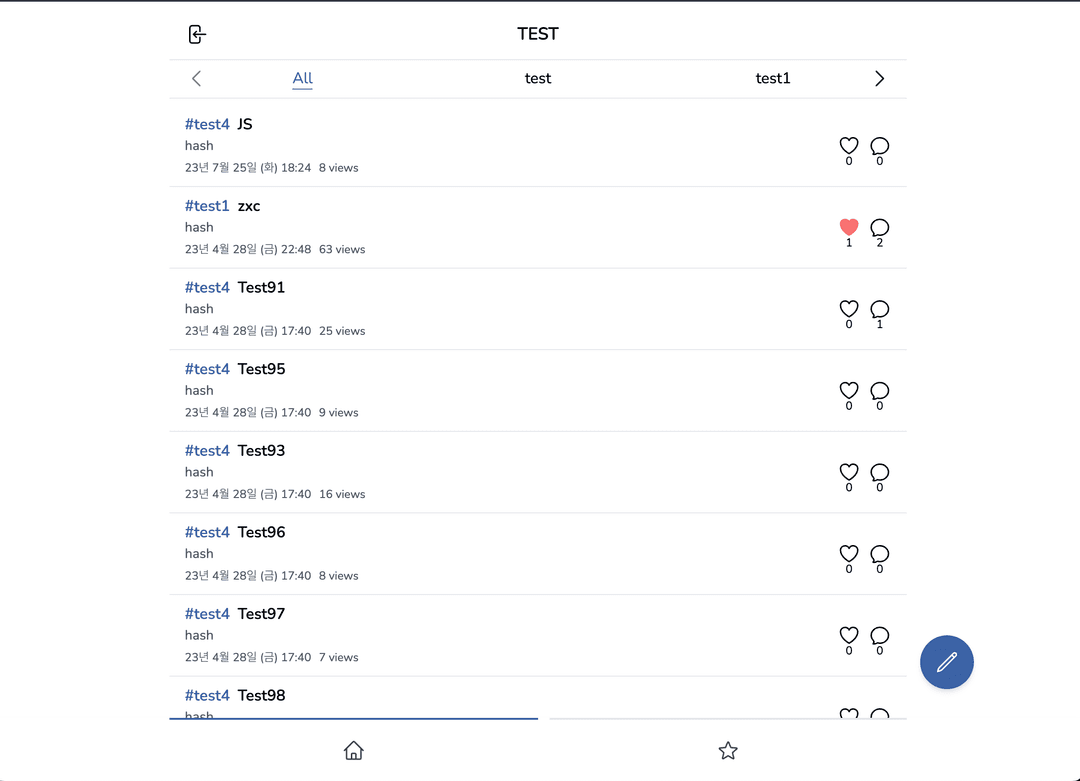
Enter 버튼이나 해시태그를 클릭시 나오는 화면.
글 조회, 작성, 필터링을 할 수 있다.
useSwrInfinite 라이브러리와 scroll 이벤트를 사용하여 무한 스크롤 구현
데이터 페칭(로딩시) 추가 요청을 하지 않게 throttle 최적화를 해주었다.
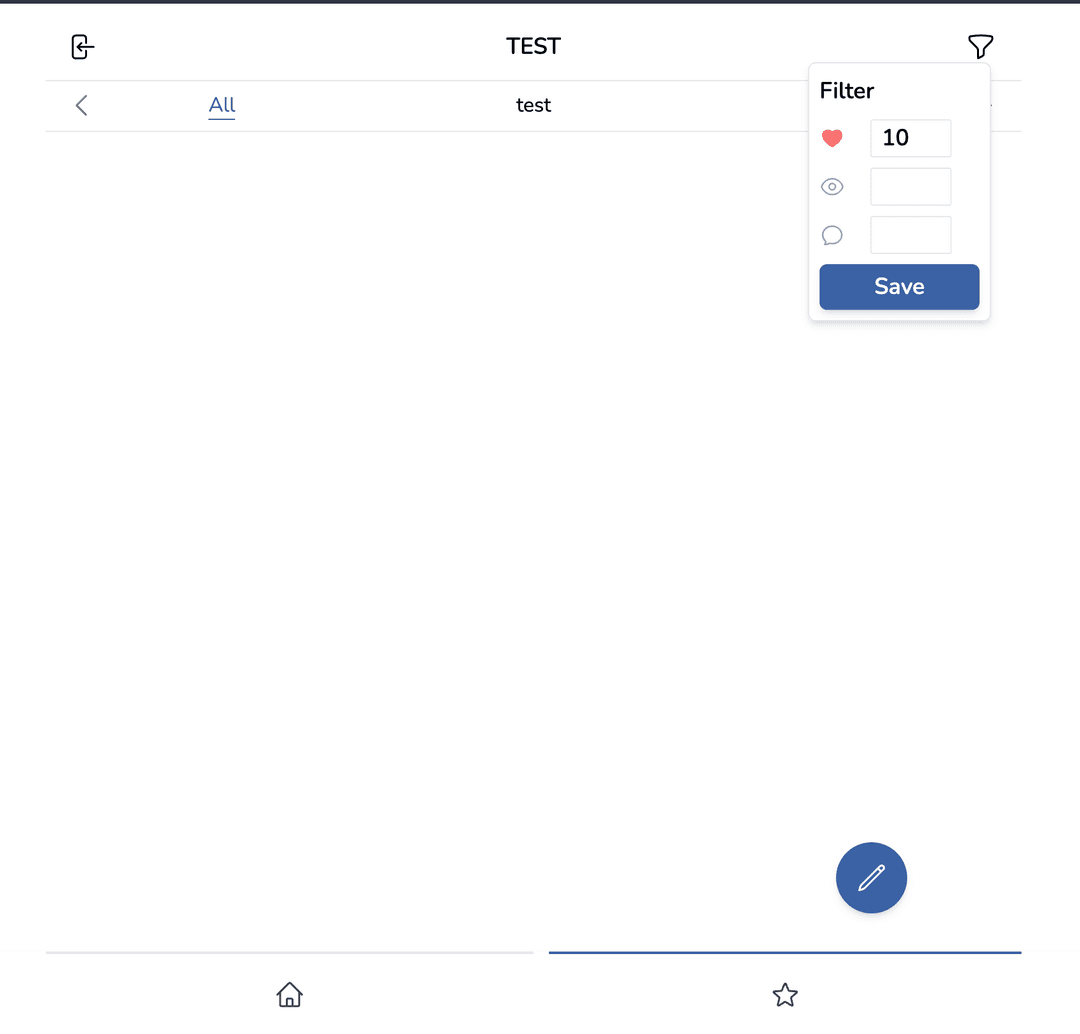
하단의 별 표시는 필터링으로 게시글의 좋아요 갯수, 조회수, 댓글 수를 필터링 할 수 있는 옵션을 제공한다.
현재는 좋아요 필터링 만 구현했으며, 기본 세팅은 10으로 되어있다.
해당 기능은 state로 관리되어 페이지를 새로고침 하면 초기화 된다.
각각의 숏컷, 해시에 개별적으로 적용하기 위해선 db의 수정이 필요함.
6. Post
-
Create
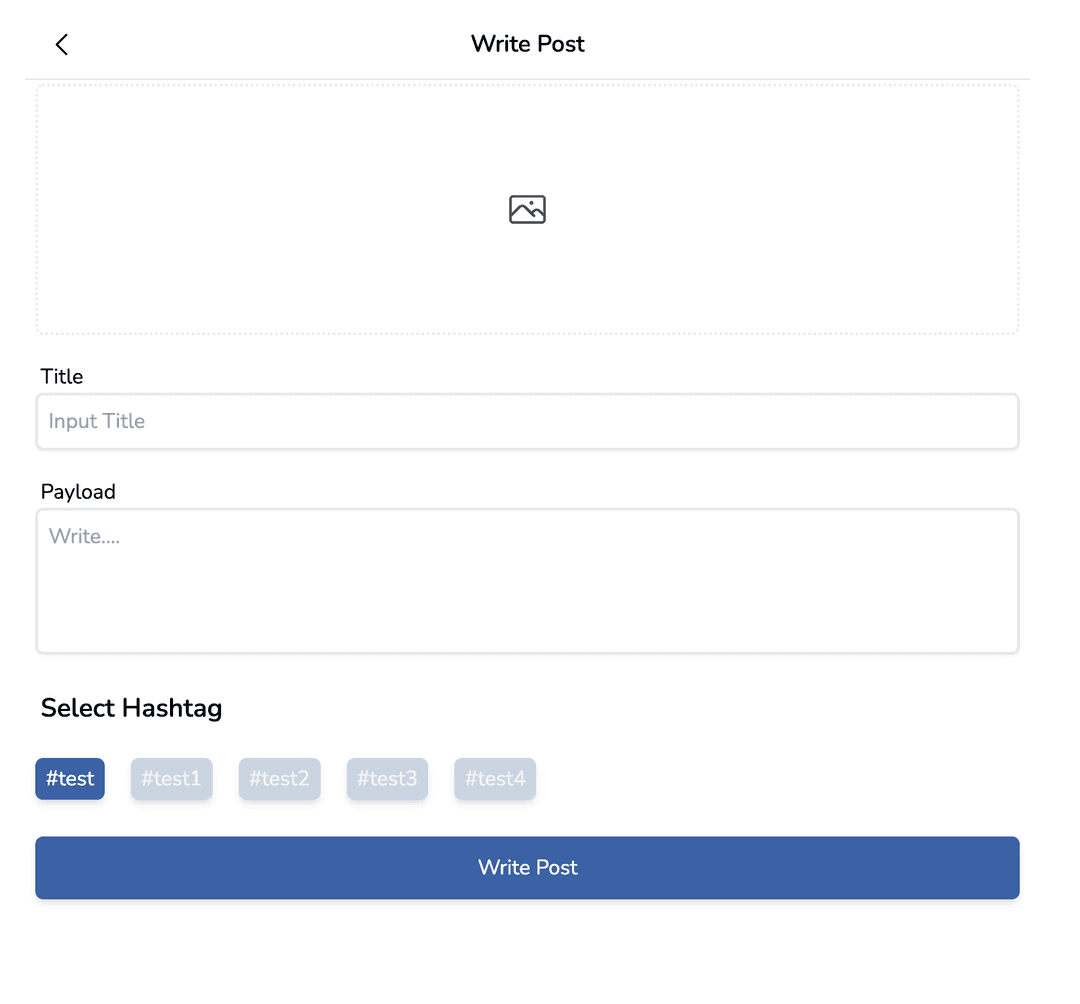
홈에서 pencil 아이콘을 누르면 글쓰기 form이 열린다.
앨범 아이콘을 클릭하면 이미지를 업로드 한다.이미지, 30자 이상의 제목, 내용을 작성해야 하며 하단의 해시태그 리스트는 커뮤니티에 입장할때 state로 제공된다.
만약 새로고침 등의 이유로 state가 존재하지 않을시에는 url상에 query로 존재하는 숏컷 해시태그(혹은 단일 해시태그)의 id를 api 요청을 통해서 해당 영역을 채운다.// /api/community/index.ts async function handler(req: NextApiRequest, res: NextApiResponse) { if (req.method === "GET") { const { session: { user }, query: { comuId, hashId }, } = req; if (comuId) { // 숏컷 해시태그의 id, 숏컷 해시태그는 편의상 community로 명칭합니다. const scHash = await client.shortcutTag.findFirst({ where: { AND: [{ id: +comuId! }, { userId: +user?.id! }] }, select: { userId: true, customName: true, hashtags: { select: { name: true, id: true, }, }, }, }); if (!scHash || user?.id !== scHash?.userId) { return res.json({ ok: false, error: "Nope" }); } return res.json({ ok: true, hashArr: scHash.hashtags, title: scHash.customName, }); } if (hashId) { const hashArr = await client.hashtag.findUnique({ where: { id: hashId ? +hashId : undefined }, select: { name: true, id: true }, }); if (!hashArr) { return res.status(401).send("BAD REQUEST"); } return res.json({ ok: true, hashArr: [{ name: hashArr.name, id: hashArr.id }], }); } } }클라이언트 호출
//client 호출 훅, 단일 해시태그는 url query에 hashId, 숏컷 해시태그는 comuId가 제공됩니다.
export default function getHashTags({
  comuId,
  hashId,
}: GetHashForm): IComuHashsInfo[] {
  const hash = useRecoilValue(comuHashsInfo);
  if (hash && hash.length !== 0) {
    return hash;
  }
  const { data } = useSWR(
    comuId
      ? `/api/community?comuId=${comuId}`
      : hashId
      ? `/api/community?hashId=${hashId}`
      : null
  );

  return data?.hashArr;
}
이미지 업로드는 Cloudflare Images 를 사용하여 구현.
해당 서비스가 제공하는 API 중 Direct Creator Upload API는
이미지를 업로드할 API 주소를 요청하고 받은 주소에 formdata를 넘겨주면
파일을 서버에 경유할 필요 없이 바로 storage에 파일 업로드를 가능하게 해준다.
https://developers.cloudflare.com/images/cloudflare-images/upload-images/direct-creator-upload/Direct URL 요청
// /api/files.ts
async function handler(req: NextApiRequest, res: NextApiResponse) {
  const {
    result: { uploadURL, id },
  } = await (
    await fetch(
      `https://api.cloudflare.com/client/v4/accounts/${process.env.CF_ID}/images/v2/direct_upload`,
      {
        method: "POST",
        headers: {
          "Content-Type": "application/json",
          Authorization: `Bearer ${process.env.CF_TOKEN}`,
        },
      }
    )
  ).json();
  res.json({ uploadURL });
}
Upload Image
const { uploadURL } = await (await fetch("/api/files")).json(); // Ajax로 form 전송을 가능하게 해주는 FormData 객체를 생성 const form = new FormData(); // append(name, value, filename) form.append("file", image[0], `post-${user?.id}-${Date.now()}`); const { result: { id }, //이 id 값이 업로드 된 후 Cloudfalre Storage에 저장된 이미지 경로이다. } = await ( await fetch(uploadURL, { method: "POST", body: form, }) ).json(); // 해당 경로는 post db에 생성 요청시 image 속성에 반영한다. postMutation({ title, payload, selectedHash: selectedHash?.name, imageURL: id, postId, }); -
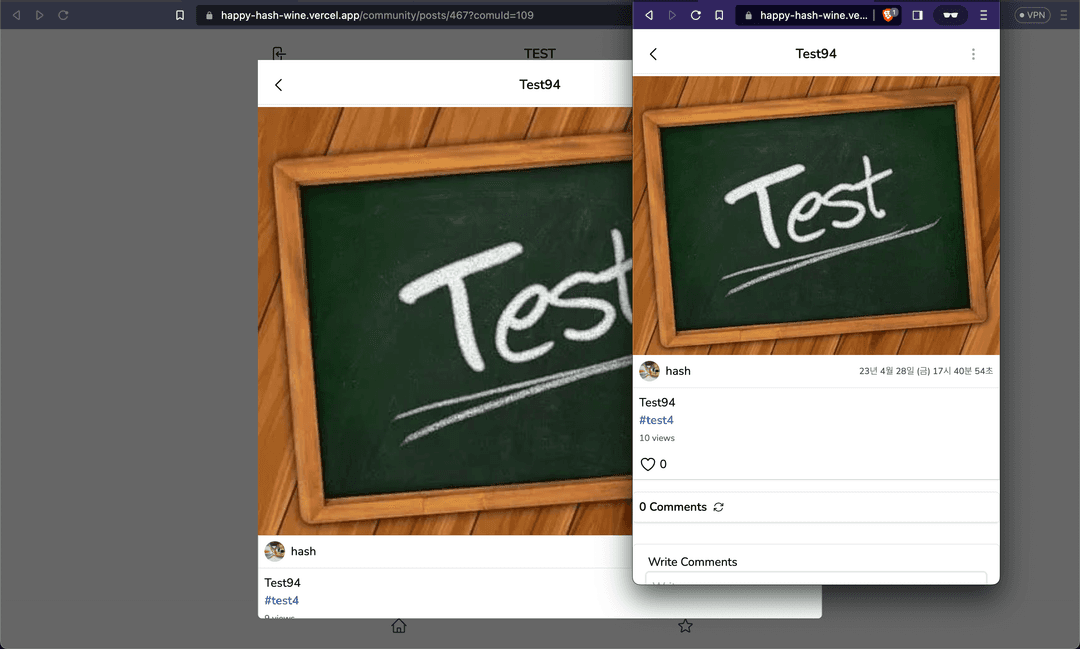
Read
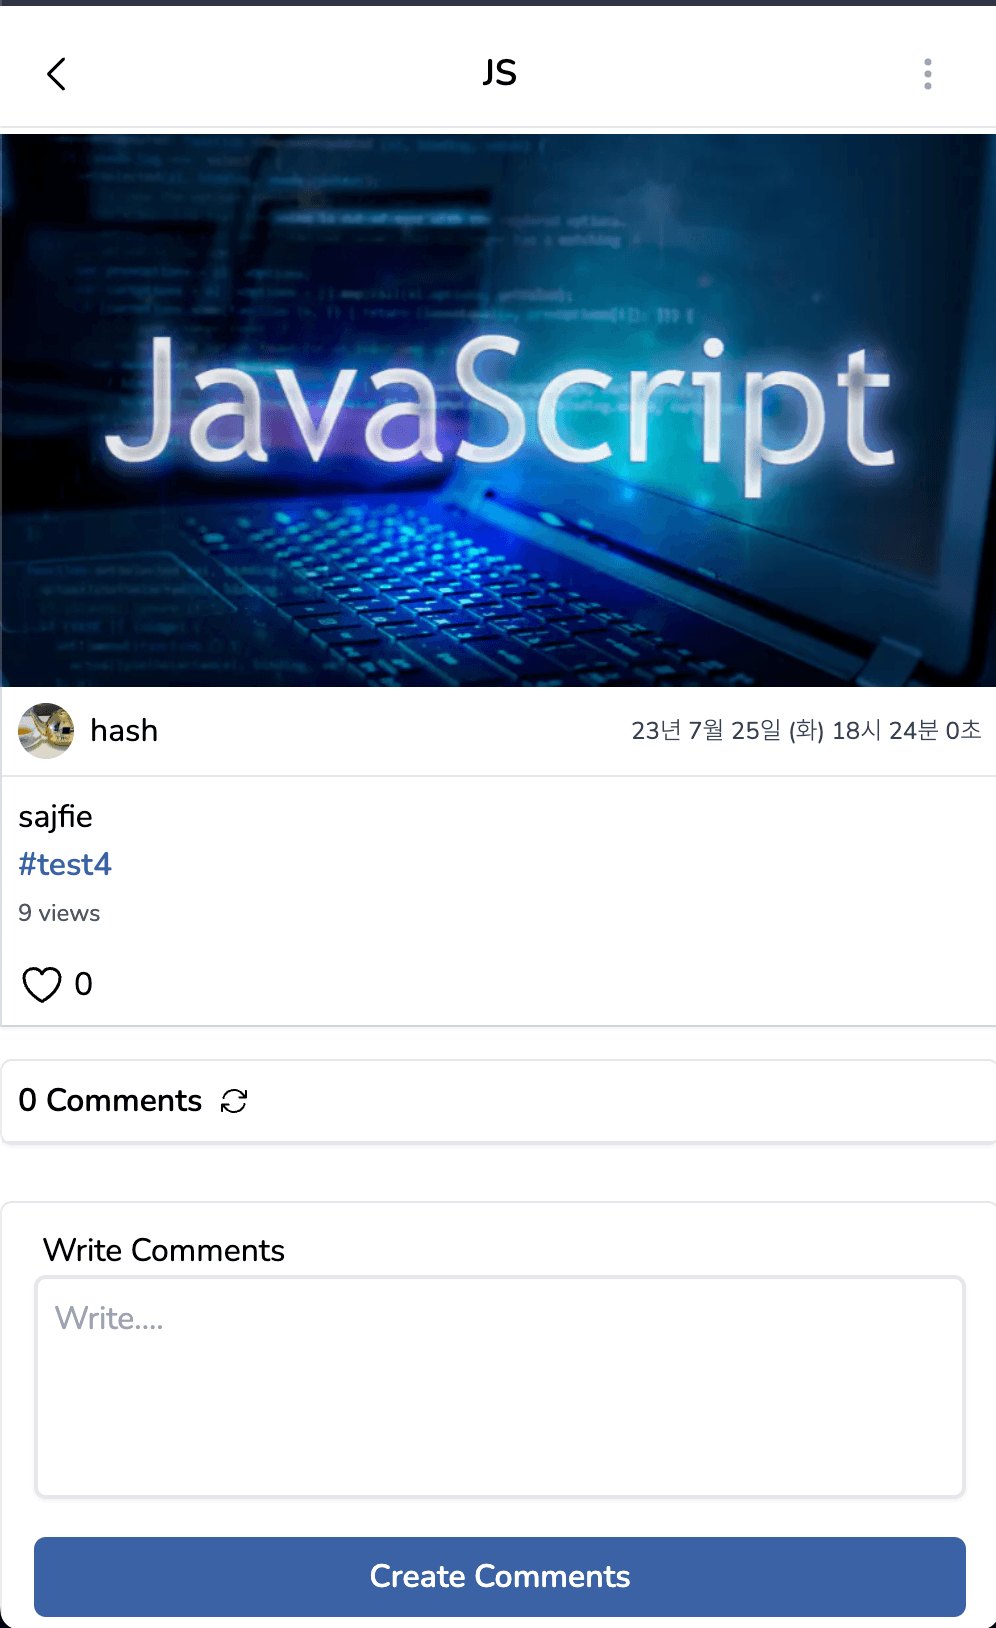
글을 클릭시 조회수가 1 증가하며, 글의 내용과 댓글을 조회할 수 있다.
세션에 저장되어 있는 유저의 id와 해당 글의 유저id가 같다면 자신이 작성한것으로 간주
우측 최상단에 ellipsis 아이콘을 보여준다.props로 초기데이터, useSWR로 최신 데이터를 가져오고, 하트 클릭시 useSWR에서 제공하는 mutate를 사용하여 캐시데이터를 편집해 요청의 결과를 기다리지 않고 즉각적인 반응을 얻을 수 있게 구현하였다.
디테일 페이지와 PostFeed 두곳에 mutate 기능을 사용함으로써 해시홈의 PostFeed에도 적용이 된다.
-
Update
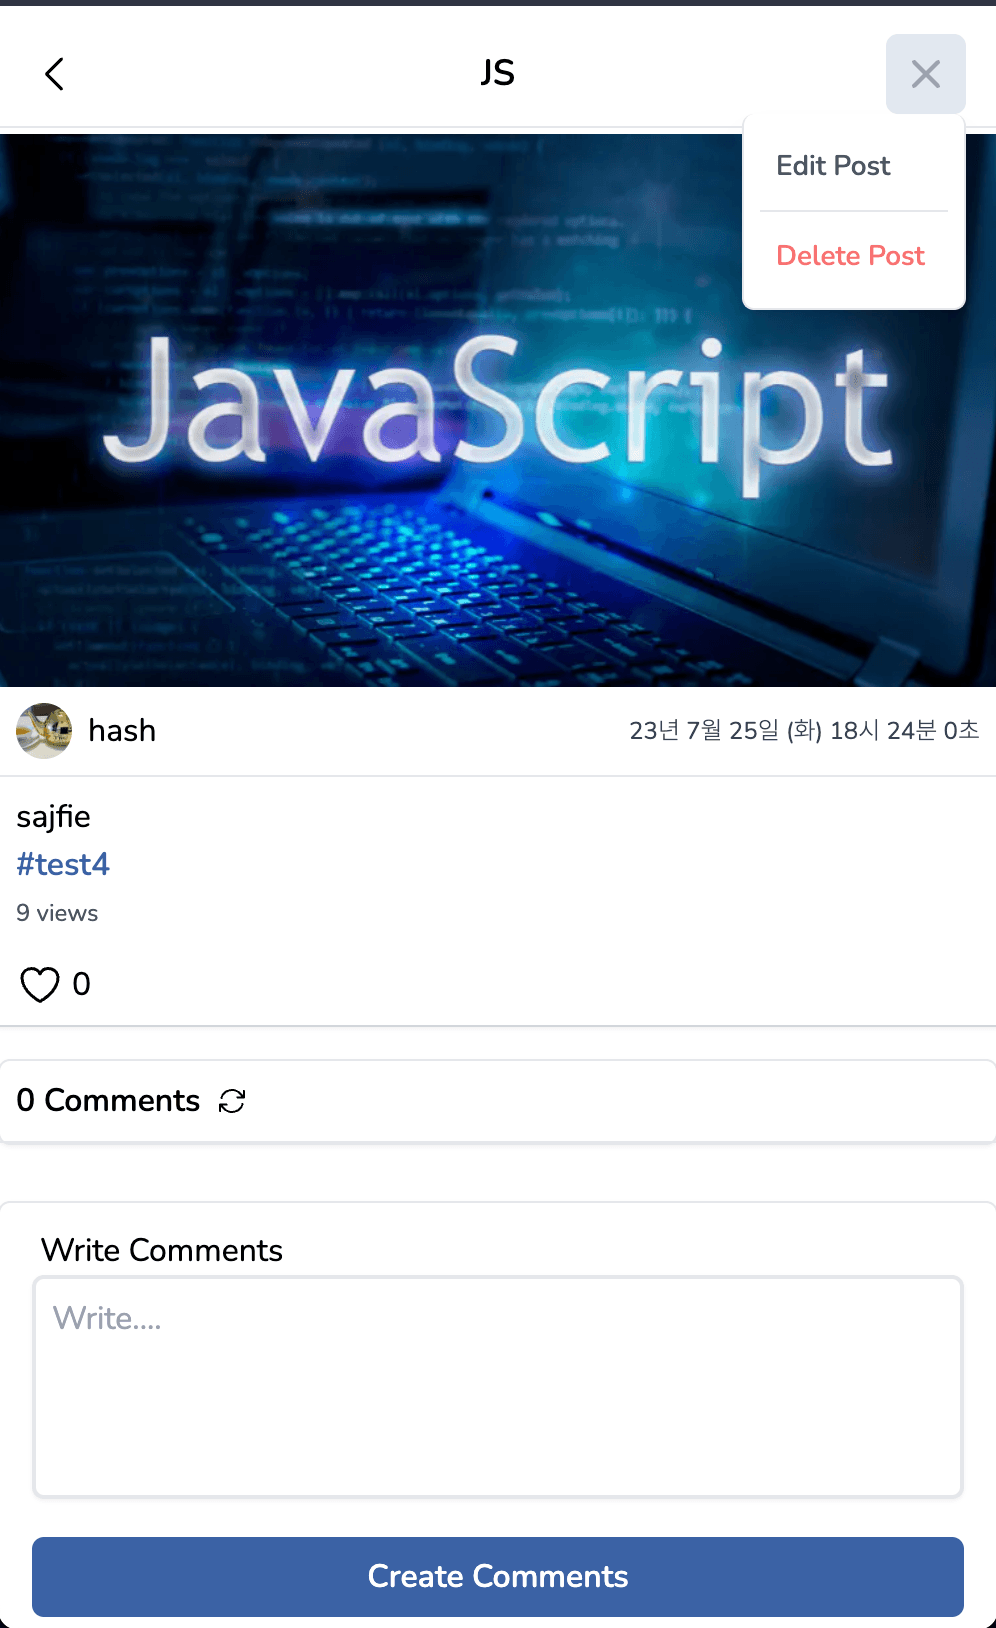
해당 글이 자신이 작성한 글이라면 edit과 delete를 할 수 있다.
edit과 write는 서로 컴포넌트를 공유한다.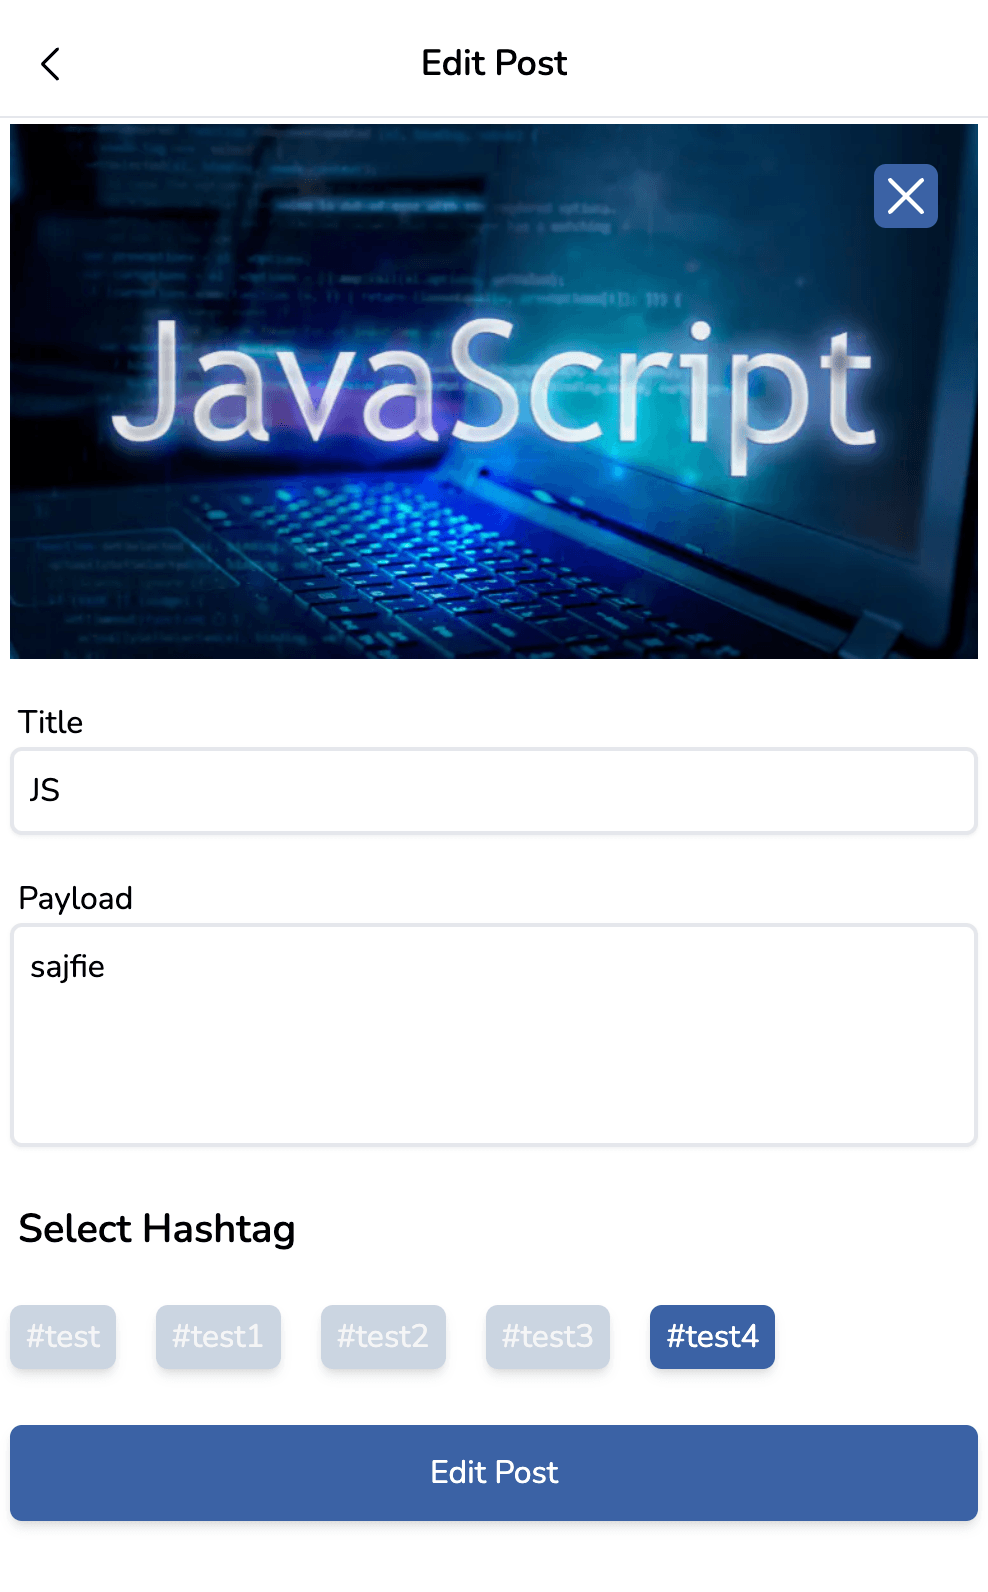
edit 클릭시 해당 post의 제목, 내용, 이미지 링크를 props로 전달받아 바로 반영될 수 있도록 구현.
image Preview라는 state를 따로 만들어 이미지를 교체하지 않았을때를 구분할 수 있도록 구현하여 불필요한 이미지 업로드 호출을 막았다.이미지 교체 및 삭제시 Cloudfalre Storage에서 삭제될 수 있게 처리하였다.
// api/community/posts/[id] if (req.method === "PATCH") { const { session: { user }, body: { imageURL, payload, title, selectedHash }, query: { id }, } = req; const prevPostData = await client.post.findUnique({ where: { id: +id! }, }); if (prevPostData && prevPostData.userId !== +user?.id!) { return res.json({ ok: false, error: "InValidate" }); } if (!imageURL) { await client.post.update({ where: { id: +id!, }, data: { payload, title, hashtag: { connect: { name: selectedHash } }, }, }); } else { await fetch( `https://api.cloudflare.com/client/v4/accounts/${process.env.CF_ID}/images/v1/${prevPostData?.image}`, { method: "DELETE", headers: { Authorization: `Bearer ${process.env.CF_TOKEN}`, }, } ); await client.post.update({ where: { id: +id!, }, data: { payload, title, hashtag: { connect: { name: selectedHash } }, image: imageURL, }, }); } res.json({ ok: true, postId: +id! }); } -
Delete
useSWR의 mutate 기능을 활용하여 캐시를 통해 해당 PostFeed를 불러온 데이터를 즉시 삭제하고
요청의 결과는 기다리지 않고 숏컷해시 홈으로 replace 요청을 보낸다.//useMutation hook, /libs/client/useMutation.ts const [deletePost, { data: deleteResponse, loading: DeleteLoading }] = useMutation<DeleteMutation>({ url: `/api/community/posts/${postId}`, method: "DELETE", }); //삭제 이벤트 const onDeleteValid = () => { if (DeleteLoading) return; // 캐시데이터를 건드려 즉각적으로 삭제된 mutate((prev) => { return ( prev && prev.map((prev) => { return { ok: true, posts: prev.posts.filter((post) => post.id !== +postId!), }; }) ); }, false); deletePost({}); // 삭제 요청 setPostMenu((prev) => !prev); //modal 닫기 // 해시 커뮤니티 홈으로 replace router.replace( `/community/posts?${comuId ? `comuId=${comuId}` : `hashId=${hashId}`}`, undefined, { scroll: false, shallow: true } ); };
7. Comments
 맨 하단의 textarea로 댓글을 작성할 수 있다.
"Comments" 우측 아이콘은 현재 comments를 최신 상태로 다시 불러온다.
댓글이 10개 이상일 시 우측 상단의 pagination navigator 가 생긴다.
 자신이 작성한 comments라면 댓글 컴포넌트 우측 하단에 아이콘이 생긴다.
해당 아이콘 클릭시 edit, delete 기능을 수행할 수 있다.
캐시데이터를 활용해 호출을 최적화 할 수 있었으나 댓글을 작성하기 전에 다른 유저가 댓글을 작성할수도 있기에 이를 반영하기 위해 요청마다 해당 페이지의 댓글을 갱신하도록 구현했다.
Comments 호출 API
if (req.method === "GET") {
  const {
    query: { id, page },
  } = req;

  const post = await client.post.findUnique({
    where: {
      id: +id!,
    },
    select: {
      id: true,
      _count: {
        select: {
          comments: true,
        },
      },
    },
  });

  if (post) {
    const comments = await client.comment.findMany({
      where: {
        postId: +id!,
      },
      include: {
        user: {
          select: { avatar: true, id: true, name: true },
        },
      },
      // pagination
      take: 10,
      skip: page ? (+page - 1) * 10 : 0,
    });
    return res.json({
      ok: true,
      comments,
      totalComments: post._count.comments,
    });
  } else return res.status(401).send("Photo not exitst");
}
Comments Edit
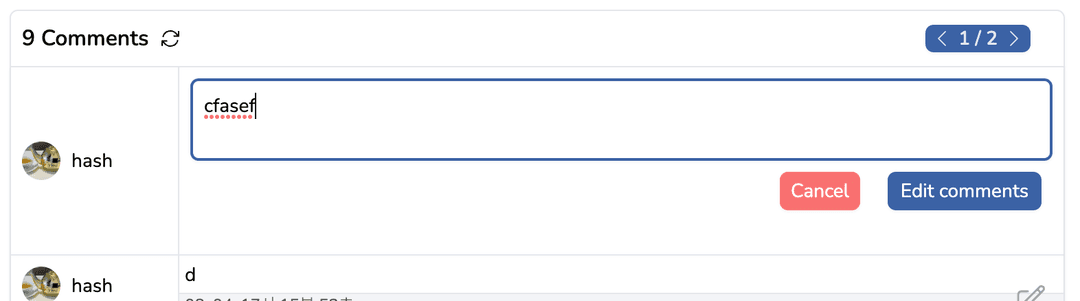
Edit을 클릭하게 되면 edit을 위한 form이 나온다.
Cancel을 누르거나, 댓글의 내용이 변화하지 않았을때는 요청을 보내지 않도록 구현하였다.
8. Post Modal Routing
글 목록 요청시 글 목록마다 세부사항에 대한 내용들이 일부 들어있도록 구현하였다.
글을 클릭시 props로 데이터를 보내면서 로딩없이 빠른 환경을 제공하기 위함이다.
이를 위해선 몇가지 과정이 필요한데 Next.js에서 제공하는 as, shallow props를 사용하여 해결했다.
모바일뷰로 보면 바로 디테일 페이지로 접속하는것으로 보이지만, 실은 modal 형식으로 열린다.
const onClickPostFeed = () => {
  // Next.js 에서 제공하는 router,  순서대로 url, as, options
  // Link 컴포넌트를 사용하면 렌더링 될때 성능 차이가 좀 있어 div 태그에 이벤트를 넣었습니다.
  router.push(
    {
      pathname: router.pathname,
      query: { postId: post.id, ...router.query },
    },
    {
      pathname: router.pathname + `/${post.id}`,
      query: { ...router.query },
    },
    {
      shallow: true,
      scroll: false,
    }
  );
  setRecyclePostInfo({
    title: post.title,
    _count: post._count,
    hashtag: post.hashtag,
    id: post.id,
    image: post.image,
    likesNum: post.likesNum,
    payload: post.payload,
    user: {
      avatar: post.user.avatar,
      id: post.user.id,
      name: post.user.name,
    },
    views: post.views,
    createdAt: post.createdAt,
  });
};
postId는 query 형식으로 전달되지만 as 옵션과 shallow를 통해서 url을 꾸며준것이다.
원래 주소는 /community/posts/468 이 아닌 /community?postId=468 가 된다.
function HashCommunity() {
  const router = useRouter();
  const {
    query: { postId, comuId, hashId },
  } = router;
  const { data } = useSWR<ComuInfoForm>(
    `/api/community?${comuId ? `comuId=${comuId}` : `hashId=${hashId}`}`
  );

  return
    <>
      {postId ? <PostModalDetail /> : null}
      <Layout ...
}
이렇게 postId라는 쿼리가 입력이 되면 modal 컴포넌트를 열게 된다.
클릭시 recoil의 setRecyclePostInfo(useSetRecoilState)를 통해 내가 클릭한 Post의 데이터를 사용할 수 있다.
새로고침, 링크로 해당 페이지를 방문할 경우 url의 표시처럼 페이지 이동을 하게 된다.
modal과 posts 디테일 페이지는 서로 컴포넌트를 공유하며, 디테일 페이지는 ssr로 동작한다.
반성
-
Cold Start
서버를 빌드하고 배포하니 Cold Start 문제가 있었다.
Cold Start의 원인은 3가지가 있다.- js 번들링 사이즈
- Prisma ORM의 문제
- Vercel
모바일 플랫폼으로 사이트를 접속한 뒤 PC에서 사이트를 접속해보면 빠르게 동작하는것을 보아 번들링 사이즈의 문제는 아닌거 같다.
-
RESTful API
나름대로의 일반화를 했으나 데이터를 넘길때 body가 아닌 uri query 형식으로 데이터로 넘겨버렸다는 사실을 깨달았다.
사용하기 간편한 REST API의 장점이 없어진다. -
지저분한 파일트리
이론보단 경험을 우선시하여 기능 개발에만 몰두한 결과 매우 지저분한 파일트리와 코드가 생겨났다.
후기
Strand 프로젝트에서 좀 더 접근성을 높이기 위해 시도한 프로젝트이나
다른 커뮤니티 사이트에 비해 홈페이지에서 제공되는 컨텐츠가 너무 부실하다는 느낌을 많이 받았다.
미완성된 기능들, SEO 최적화의 필요성, 그에 따른 렌더링 방식의 변경, db를 수정해야 더 좋은 서비스를 제공할 수 있는 기능들도 있다.
무엇보다 Next.js 의 App Router와 중간에 새롭게 배운 이론들이 있어 많은 개선이 필요한 프로젝트이다.
한국에서 트래픽이 많은 사이트를 분석해보면서 만들어 나름의 노하우들을 느낄 수 있었지만
아무래도 해외시장이 기술적인 부분에서 트랜디 하기 때문에 다음 포트폴리오는 해외 서비스를 참고하여 만들어야겠다는 생각을 하게 되었다.
Next.js 13에 추가된 App Router를 사용하여 좀 더 견고한 서비스를 제공할 수 있는 프로젝트를 만들 계획이기에 리팩토링 계획은 없다.
-
배운점
다른 메이저 사이트에서 제공하는 modal 형식의 Routing을 클론해보면서 나름의 이점을 느꼈다.
Serverless 환경에서 이미지를 업로드 하는 방식과 Formdata를 사용하여 처리하는 방식을 배웠다.
-
개선안
-
해시 커뮤니티 홈의 필터링 기능을 state만으로 관리하지 않고 localstorage나 db로 값을 설정하고 기억할 수 있도록 개선
-
Sroll event 대신 Interception Observer Api를 활용하여 Infinite Scroll 구현
-
검색어 추천기능, 홈페이지 서비스 기능 추가
-
SEO 최적화
-
Next.js 13v 으로 migration
-